Jetpack is a popular WordPress plugin created by Automattic, the people behind WordPress.com. The plugin brings many of the most powerful features available on WordPress.com to self-hosted WordPress sites, and thereby contributing greatly to the improvement of WordPress powered blogs and websites.
In this article, I'm going to share five great features of the Jetpack plugin that you may not know about, including how to enable, configure, and use them on your WordPress site.
Custom CSSEditing the core CSS files of a WordPress theme is rarely the best approach to modifying, or customizing a WordPress theme. Mistakes can be made which damage the theme, and customizations can be lost if the theme is updated.
With the Jetpack Custom CSS feature, editing, modifying, and customizing can be done without laying a single finger on the theme's core CSS files. If mistakes are made, they can be corrected easily. Revisions can be done faster, and restoring the CSS back to default will not be a problem either!
How the Custom CSS Feature WorksBy default, and on activating Jetpack, the Custom CSS module is automatically activated and can be found in the admin under, Dashboard → Appearance → Edit CSS.
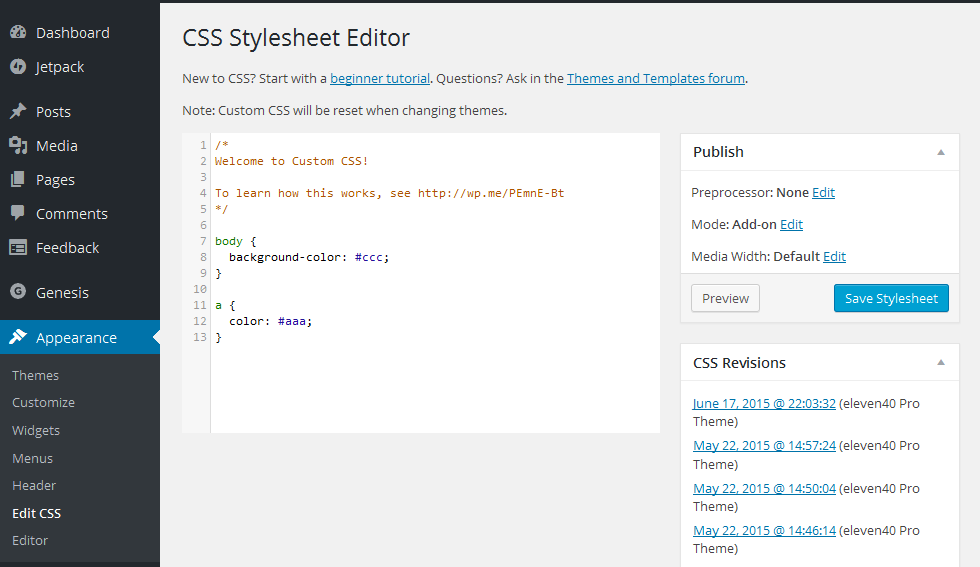
Here you can use standard CSS syntax to specify the selectors and properties to create your custom styles. For example, if you wish to change the body background color of all pages, and perhaps the color of all links, you could enter in the style editor the CSS code below and click Save Stylesheet.
body { background-color: #ccc;} a { color: #aaa;}The revisions are located beside the CSS editor on a Desktop view. Each revision is labelled with the revision date. On opening a revision, the red highlights specify what has been removed, while the green highlights specify what has been added.

To restore a previous version of your custom CSS, click Restore This Revision for that date and the custom CSS will be reverted back. Just in case you need to activate the module manually: Dashboard → Jetpack → Custom CSS and Activate.
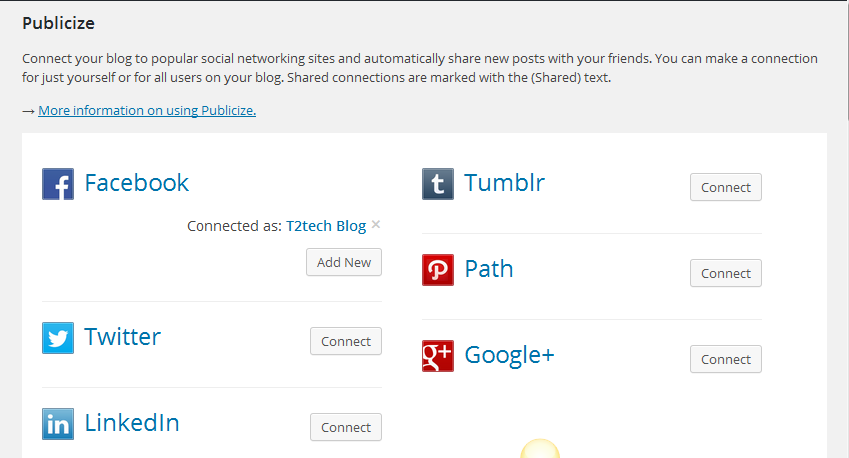
PublicizeDo you find social media sharing a challenge or too time consuming? With Jetpack, you can instantly share your update across six popular platforms.
After connecting to the various social networks you'll be broadcasting to, the Publicize module handles the automatic sharing of your posts on the networks you have selected.
How to Configure the Publicize FeatureAfter activating the feature Dashboard → Jetpack → Settings → Publicize and Activate, you can configure the feature by navigating to the sharing settings page Dashboard → Settings → Sharing and connect your blog to the social networks you prefer.
There are many related posts plugins for WordPress, many of which work well, but if you want one that will perform an accurate calculation to determine if a post is related without bogging down your database or adding extra load on your server, or you're interested in reducing the bounce rate on your blog, then you should consider activating the Jetpack Related Posts module.
The Related Posts module does all the necessary calculations and analysis before concluding that posts are related. All the processes are carried out on the WordPress.com servers, so there's no extra load on your server.
Activating the Related Posts ModuleYou can activate the module by visiting the admin and selecting Dashboard → Jetpack → Settings → Related Posts and Activate. After activating, the module takes it from there, and shows the related posts below each published posts.
SharingAfter publishing great content, it's a good idea to give readers the opportunity to share your content with their networks to give you added exposure.
The sharing module makes this easy. Content can be shared on different social networks with just a single click.
How the Sharing Feature WorksThe settings page for the sharing feature can be found at Dashboard → Settings → Sharing. At the time of writing, there are eleven share buttons you can drag and drop to the positions you want.
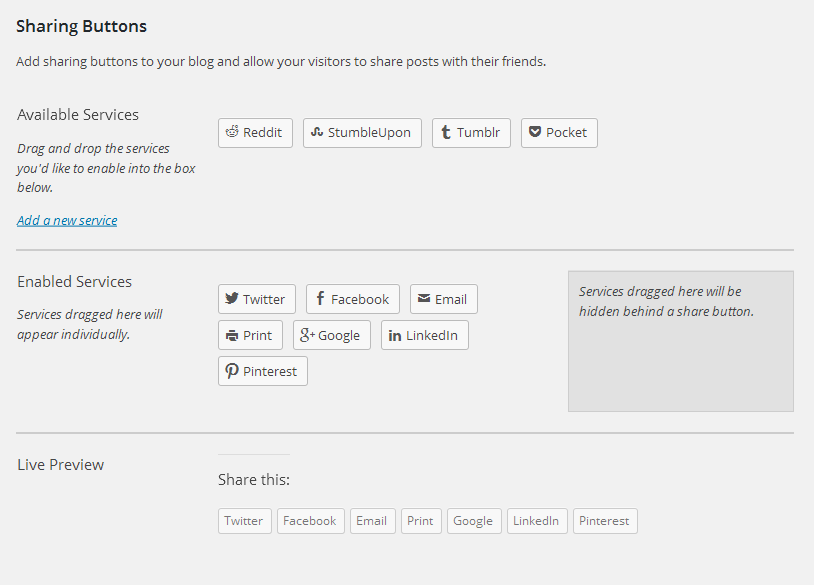
You can select how you want the buttons to be displayed: either in a text-only form, or as icons instead. The buttons can also be displayed before the content or after it, depending on which you prefer.
PhotonAccording to the official documentation of Jetpack plugin features: "Photon is an image acceleration and editing service for sites hosted on WordPress.com or on Jetpack-connected WordPress sites. That means less load on your host and faster images for your readers."
This feature can be very beneficial. I've seen some sites where it's possible to read the whole blog post before the images have even finished loading. This is where the Photon feature of Jetpack comes in handy.
How the Photon Feature WorksThe feature loads your post's images through the WordPress.com CDN. It relieves your server of the extra load, and does it all through the WordPress.com servers.
You can activate the feature by visiting your WordPress admin, Dashboard → Jetpack → Settings → Photon and then Activate. You should also check this article by Jacco Blankenspoor to learn more about CDNs and why you should consider setting one up for your WordPress site.
ConclusionI've only given you a small taste of what Jetpack can do for your site, at the time of writing there are over 30 more great features like the ones highlighted above that come with the plugin, and only the VideoPress and VaultPress modules are premium (paid for) features.
Once you've got it installed, I'm sure you'll agree with me that Jetpack is a feature rich plugin that will save you a lot of time. You can visit the official Jetpack plugin page here.
Source: 5 Things You May Not Know about Jetpack for WordPress
No comments:
Post a Comment