This article is part of a series created in partnership with SiteGround. Thank you for supporting the partners who make SitePoint possible.
I have a love/hate affair with the dark grey toolbar introduced in WordPress 3.3. (It was previously named the Admin Bar in WordPress 3.1 and that name stuck for many — including the API authors!). Looking at the positives, the toolbar provides a consistent set of quick links when you're viewing the administration panels or the live website. That said, it can cause problems when creating themes or confuse site editors who think everyone can see it.
Fortunately, it's easy to change the toolbar. We're going to achieve it using a custom WordPress plugin, but you could also consider adding identical code to your theme's functions.php file.
The WordPress Admin Bar APIThe WP_Admin_Bar class provides the following methods:
We're going to use add_node() and remove_node() in our new plugin…
Create a New PluginCreate a new file in the WordPress wp-content/plugins/ folder named admin-bar.php then add the following plugin header:
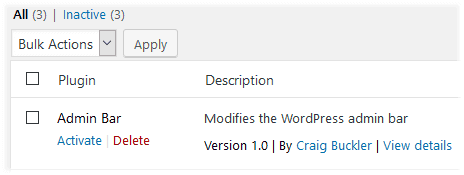
<?php /* Plugin Name: Admin Bar Plugin URI: http://www.sitepoint.com/ Description: Modifies the WordPress admin bar Version: 1.0 Author: Craig Buckler Author URI: http://twitter.com/craigbuckler License: MIT */You can now activate this plugin in the WordPress administration panel. It won't do anything yet but you can make additions, save then refresh to view the updates.
Add the following line to the plugin code to remove the toolbar:
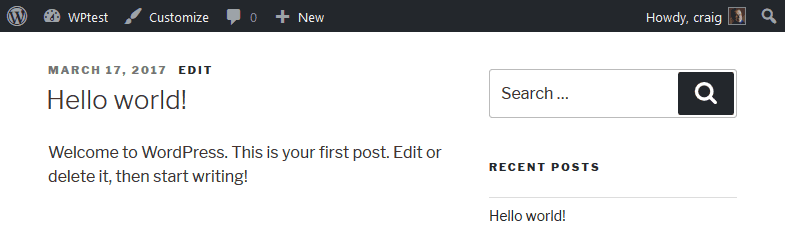
// remove admin bar add_filter('show_admin_bar', '__return_false');Save then refresh to check that it's gone!
Remove Toolbar ItemsPresuming you haven't removed the toolbar, you can remove existing items with the remove_node() method. For this, we need to create a new function named update_adminbar() which is passed an WP_Admin_Bar object ($wp_adminbar). This function is called when the admin_bar_menu action hook is activated:
// update toolbar function update_adminbar($wp_adminbar) { // remove unnecessary items $wp_adminbar->remove_node('wp-logo'); $wp_adminbar->remove_node('customize'); $wp_adminbar->remove_node('comments'); } // admin_bar_menu hook add_action('admin_bar_menu', 'update_adminbar', 999);In this example we're removing the:
Save admin-bar.php then refresh to verify it worked.

You can remove any item by passing its ID to the remove_node() method. The ID can be found in the HTML source:
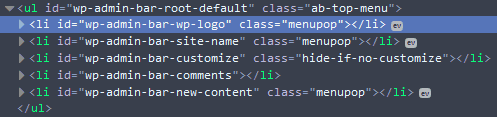
Find the HTML ID then remove "wp-admin-bar-" from the start of the string to give you the toolbar menu ID name.
Add New Toolbar ItemsThe add_action() hook we called above sets a priority of 999. Any new menus we define in update_adminbar() will appear at the right-hand end of the toolbar after all other items. You can set a lower priority to use a different position. The WordPress logo has a priority of 10 with each additional toolbar item adding another 10 to that total. Therefore, using a priority of 11 would add items to the right of the WordPress logo, e.g.
add_action('admin_bar_menu', 'update_adminbar', 11);We'll leave the priority at 999 because we're removing items which have to be added before we can remove them!
Next, we'll add two new menu items which link to the SitePoint home page and the SitePoint Community Forums. The add_node() method accepts an associative array which defines a single toolbar item:
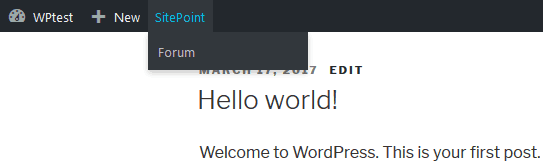
We can therefore add the SitePoint main menu and Forum sub-menu item in our plugin's update_adminbar() function:
// update toolbar function update_adminbar($wp_adminbar) { // remove unnecessary items $wp_adminbar->remove_node('wp-logo'); $wp_adminbar->remove_node('customize'); $wp_adminbar->remove_node('comments'); // add SitePoint menu item $wp_adminbar->add_node([ 'id' => 'sitepoint', 'title' => 'SitePoint', 'href' => 'https://www.sitepoint.com/', 'meta' => [ 'target' => 'sitepoint' ] ]); // add Forum sub-menu item $wp_adminbar->add_node([ 'id' => 'spforum', 'title' => 'Forum', 'parent' => 'sitepoint', 'href' => 'https://www.sitepoint.com/community/', 'meta' => [ 'target' => 'sitepoint' ] ]); } // admin_bar_menu hook add_action('admin_bar_menu', 'update_adminbar', 999);Note: [] declares an array in PHP 5.4 and above. If you're using a previous version, replace it with array().
Save admin-bar.php then refresh to see the new toolbar:
You should now be able to create the perfect WordPress toolbar for every project!
Source: How to Customize the WordPress ToolBar
No comments:
Post a Comment